How to Freeze Garlic: Preserve Flavor & Slash Prep Time
In the bustling rhythm of modern kitchens, anything that can save time without compromising quality is a true culinary treasure. Enter frozen garlic – a simple yet incredibly effective way to keep this ubiquitous aromatic ready at your fingertips. Far from being a lesser substitute, learning how to freeze garlic properly can be a game-changer, preserving its pungent flavor, cutting down on daily prep, and significantly reducing food waste. Whether you’re a meal-prep enthusiast, a busy home cook, or someone who frequently finds themselves staring down a sprouting head of garlic, the freezer offers a smart solution.
Garlic is a cornerstone of global cuisine, providing depth, warmth, and a characteristic zest to countless dishes. But dealing with peeling, mincing, and chopping every single time can be tedious and messy. Freezing garlic transforms this chore into a quick grab-and-go convenience, ensuring you always have that essential burst of flavor on hand. It's not just about convenience; it’s about smart cooking and getting the most out of your ingredients.
Why Freezing Garlic Is a Kitchen Game-Changer
Many cooks might assume freezing diminishes the quality of fresh produce, but garlic is an exception. When done correctly, it’s an incredibly effective preservation method. Here’s why mastering how to freeze garlic should be on every home cook’s radar:
- Preserves Potent Flavor: Contrary to popular belief, frozen garlic retains a remarkable amount of its original pungency and aroma. While its raw bite might mellow slightly, it still delivers a powerful punch when cooked, perfect for sautés, soups, and marinades. Think of it as having high-quality, pre-prepped garlic that's just a freezer away from your skillet. If you're curious about the specifics, you can delve deeper into Does Frozen Garlic Taste Good? Your Guide to Long-Lasting Freshness.
- Slashes Prep Time: This is arguably the biggest win. Imagine grabbing a pre-portioned garlic cube or a handful of peeled cloves directly from the freezer and dropping them straight into your cooking. No more peeling sticky skins or wrestling with a garlic press when you're in a hurry. This efficiency makes weeknight dinners smoother and more enjoyable.
- Minimizes Food Waste: How many times have you bought a large bag of garlic only to find half of it shriveled or sprouted weeks later? Freezing eliminates this problem entirely. It allows you to buy in bulk when prices are good or preserve a farmers' market haul, ensuring every clove gets used before it goes bad.
- Always Ready: Forget last-minute trips to the store because you're out of garlic. With a freezer stash, you're always prepared, empowering spontaneous cooking and ensuring your favorite recipes are never out of reach.
Choosing Your Freezing Method: Tailoring to Your Needs
Just like there are many ways to use garlic, there are several effective methods for freezing it, each catering to different culinary applications. The "best" way to freeze garlic truly depends on how you plan to use it. Here’s a breakdown of the most popular and effective techniques:
1. Freezing Garlic Purée or Paste (The Ice Cube Tray Method)
This method is the unsung hero for anyone who frequently uses minced or puréed garlic in sauces, stir-fries, or soups. It offers incredible convenience and precise portion control.
- How to do it: Start with peeled garlic cloves. In a food processor, blend the cloves with a small amount of neutral oil (such as olive oil, vegetable oil, or avocado oil). The ratio is typically around two parts garlic to one part oil, though you can adjust slightly to achieve your desired consistency. The oil helps keep the garlic soft and scoopable even when frozen, preventing it from turning into a rock-hard block. Purée until you reach a smooth paste or a finely minced consistency.
- Portioning: Spoon the garlic mixture into ice cube trays. Each standard ice cube slot typically holds about one tablespoon of purée, making portioning incredibly simple.
- Freezing & Storage: Freeze until solid (this usually takes a few hours). Once frozen, pop the cubes out and transfer them to an airtight freezer bag or container. This prevents freezer burn and keeps your freezer smelling fresh.
- Benefits: Instant minced garlic, perfectly portioned, ready to drop directly into hot dishes. The oil also helps maintain flavor and texture.
2. Freezing Peeled Whole Garlic Cloves
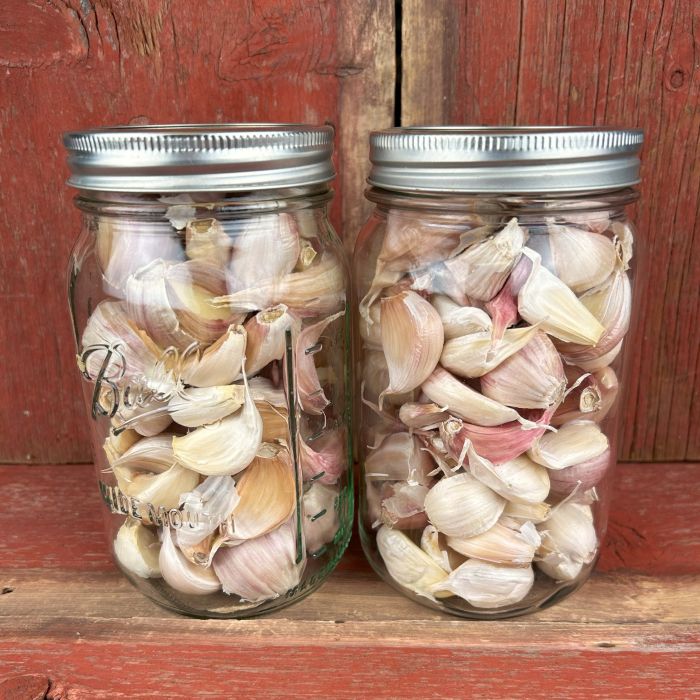
If you prefer to mince or slice your garlic fresh for each recipe but want to skip the tedious peeling, freezing whole, peeled cloves is an excellent option.
- How to do it: Simply peel your garlic cloves. You can use a gentle smash with the flat of a knife or submerge them in hot water for a minute to make peeling easier. Ensure they are completely dry before freezing to prevent them from sticking together.
- Freezing & Storage: Arrange the peeled cloves in a single layer on a baking sheet lined with parchment paper. Freeze for an hour or two until solid. This "flash freezing" step prevents them from clumping. Once hard, transfer them to an airtight freezer bag or container.
- Benefits: Minimal prep upfront, versatile for various cutting methods post-thaw, and great for recipes where you need a chunkier garlic texture. You can easily grate a frozen clove directly into a dish or quickly chop it.
3. Freezing Chopped or Minced Garlic
This method offers a middle ground between the purée and whole cloves, providing ready-to-use chopped garlic for those recipes that don't require a paste.
- How to do it: Peel and finely chop or mince your garlic cloves. You can optionally toss them with a tiny bit of oil (about a teaspoon per cup of chopped garlic) to help prevent clumping and preserve texture, though it's not strictly necessary if you flash freeze.
- Freezing & Storage: Spread the chopped garlic in a thin layer on a parchment-lined baking sheet. Flash freeze until solid. Once frozen, transfer to an airtight freezer bag or container. For even more precise portions, you can press the chopped garlic into small, tablespoon-sized mounds before flash freezing.
- Benefits: Ready-to-use chopped garlic, perfect for quick sautés or dressings where you might want a finer texture than a whole clove.
For more detailed strategies and comparisons between these methods, explore Best Ways to Freeze Garlic: Cubes, Cloves & Flavor Retention.
Does Frozen Garlic Still Taste Good?
This is a common question, and the answer is a resounding "yes!" However, it's important to set expectations. Frozen garlic retains its characteristic flavor incredibly well, making it perfectly suitable for the vast majority of cooked dishes. When thawed and cooked, its zest and aroma are nearly indistinguishable from fresh garlic in applications like:
- Sautés and stir-fries
- Soups, stews, and chili
- Marinades and rubs
- Sauces (pasta sauces, gravies)
- Roasts and casseroles
Where you might notice a slight difference is in dishes where raw garlic is the star, such as a fresh vinaigrette, pesto, or bruschetta topping. Freezing can slightly mellow garlic's raw, sharp bite and soften its texture, making it less ideal for raw applications where its crispness and aggressive pungency are desired. For cooked applications, however, frozen garlic truly shines, delivering consistent flavor without the fuss.
Tips for Success: Maximizing Flavor and Longevity
To get the most out of your frozen garlic, keep these best practices in mind:
- Skip the Blanching: Unlike some vegetables, garlic does not benefit from blanching before freezing. In fact, blanching can dull its flavor, so it's best to skip this step entirely. Peel, prep, and freeze – it's that simple!
- Airtight is Key: Whether you choose bags, containers, or ice cube trays, ensure your garlic is stored in truly airtight packaging. This is crucial for two reasons: preventing freezer burn, which degrades flavor and texture, and containing garlic's strong aroma, protecting other items in your freezer from absorbing its scent.
- Label and Date: Always label your frozen garlic with the date it was prepared. While technically safe indefinitely, garlic's flavor and potency begin to diminish after about 6 months. Aim to use your frozen stash within this timeframe for optimal taste.
- No Thawing Necessary for Cooking: One of the biggest advantages of frozen garlic is that you can often use it directly from the freezer! Drop frozen purée cubes into a hot pan, add frozen whole cloves to a slow cooker, or toss chopped garlic into a simmering sauce. It will thaw quickly in the heat of your dish.
- Consider Your Oil: If using the purée method, choose an oil that complements your typical cooking style. Olive oil is excellent for Mediterranean or Italian dishes, while a neutral oil might be better if you cook a wider variety of cuisines.
Step-by-Step Guide: How to Freeze Garlic the Right Way
Ready to revolutionize your kitchen prep? Here’s a simple, actionable guide to freezing garlic:
- Gather Your Garlic: Start with fresh, firm heads of garlic. Avoid any with soft spots, green sprouts, or mold. The fresher the garlic, the better the results.
- Peel the Cloves: This is often the most time-consuming part. For larger quantities, try separating the cloves and giving them a gentle smash with the flat side of a chef’s knife. The skins should loosen easily. Alternatively, a quick soak in warm water can also aid in peeling. Ensure all cloves are completely peeled.
- Choose Your Prep Method:
- For Purée/Paste: Place peeled cloves in a food processor with a splash of neutral oil (approx. 2 parts garlic to 1 part oil). Process until smooth or finely minced.
- For Whole Cloves: Leave the peeled cloves whole.
- For Chopped/Minced: Finely chop or mince the peeled cloves using a knife or food processor. You can lightly toss them with a small amount of oil if desired.
- Portion and Flash Freeze (Recommended):
- For Purée: Spoon the mixture into ice cube trays.
- For Whole or Chopped: Spread the garlic in a single layer on a parchment-lined baking sheet.
- Transfer to Airtight Storage: Once frozen solid, pop the garlic cubes out of the trays or scrape the whole/chopped garlic off the baking sheet. Transfer them to heavy-duty freezer bags (squeeze out as much air as possible) or airtight freezer-safe containers.
- Label and Store: Don’t forget to label your bags or containers with the contents and the date. Store in the freezer for up to 6 months for best quality.
Mastering how to freeze garlic is a small change with significant impact on your cooking efficiency and enjoyment. By taking a little time upfront, you equip your kitchen with a constant supply of this essential aromatic, ready to infuse flavor into any dish without the hassle. It’s a testament to smart kitchen management, ensuring you always have the best ingredients at your disposal, perfectly preserved and endlessly convenient.
